Get Started Step-by-Step Guide for Selling Point - Store Credit Migration
Here is the step-by-step guide on how to get started migrating Store Credits with Selling Point :
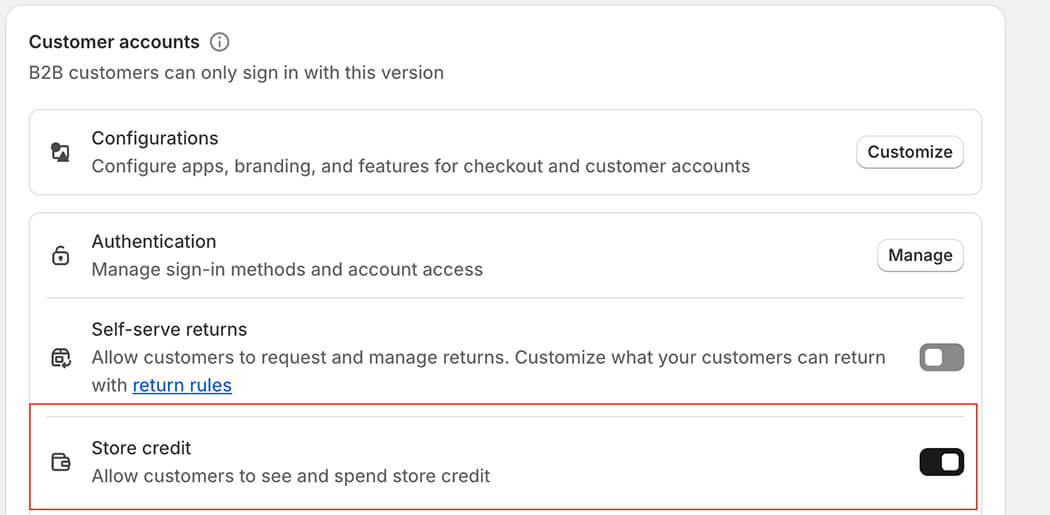
- Selling Point is an app that helps you migrate Store Credits from any POS or Website into Shopify. Your customers will be able to use their legacy store credits from your old platform right on Shopify.
- To get started, download all of your Store Credits out of your legacy system. Your old system will usually have those store credits available for export in a CSV (which simply means comma separated values) format.
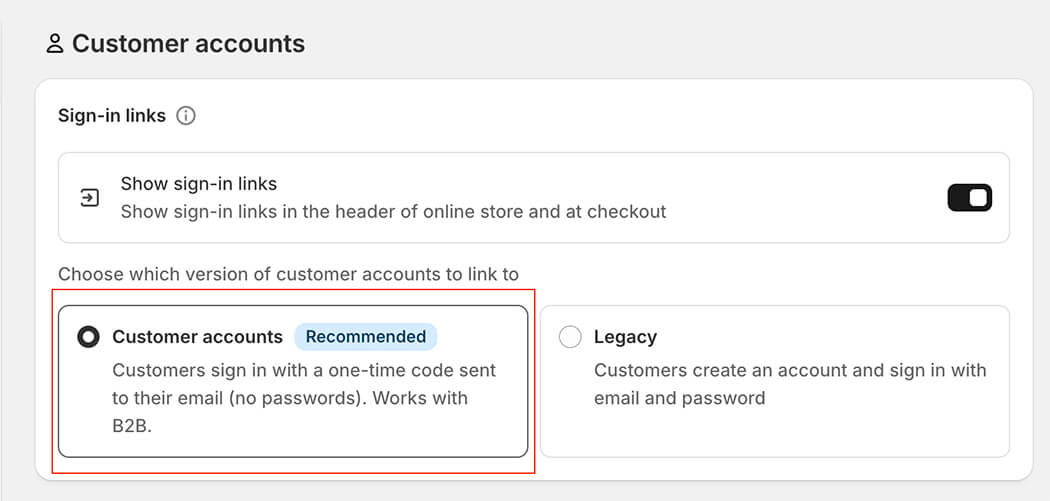
- Please Note: You need to be on new customer accounts you can't use legacy accounts on your store.
-
-
- Please also note: In order to link Store Credits to a customer's account via email or phone number (we recommend using either email or phone number per customer not both) you have to first make sure those customers are preliminarily imported into your store.
- *If those customers already exist in your store then you can skip this step entirely. The app will not create customers, so you'll first need to use the Customer CSV to import all of the customers you want to link Store Credits to first. Then run the app after they are successfully imported.
- Now let's start with the Store Credit CSV formatting:
- Download the sample Store Credits CSV here.
- There are only 3 required columns in the Selling Point CSV making it extremely user friendly!
- Here's an example CSV with all of the required fields:
- Example with emails:
-

- Example with phone number:
-

- Here's an example CSV with all of the required fields:
- Phone OR Email (required): The email or the phone number is how we make sure the appropriate customer gets the store credit. We recommend using email over phone number but generally either will work. Again you are required to either have email or phone for every single store credit. We need this value to properly identify the recipient.
- Balance (required): This is the remaining value that's left on the Store Credit. So in your store if a customer has a $100.00 of Store Credit that you want to migrate you'd add 100.00 to the balance column. When formatting in your CSV, please do not add the currency and please add the cents. $100.00 would be written as 100.00 *Please do not add any currency symbols to your values it will error out.
- Currency (required): This is the currency that your online store store utilizes. For the USA it's USD. You can find a list of popular currencies here.
- **Despite the presence of additional headers (for very specific use cases--see below), a 3-column CSV will be perfectly acceptable to ensure proper import. The large majority of merchants will only utilize these 3 main columns!**
- You need all of the headers in your CSV for the CSV to validate it's totally fine for the columns to be blank. Here's an example of a perfectly acceptable Store Credit CSV with only 3 columns:
-
- Please double check your CSV before importing as you won't be able to update Store Credits in bulk once they are imported. You'll only be able to manually edit them one by one.


If you're interested in some of the more advanced columns continue reading.
- The remaining column is not required but still have to keep the blank columns for them however, you aren't required to use them.
- Expires on: If the gift card expires then you can add the date when the Gift Card is set to expire. It has to be in this format: 2035-01-02. In this case, the Gift Card would expire on January 2nd, 2035.
-
If you filled in every single column, here's how it would look:

- Once you've got your CSV formatted correctly all you have to do is import the file and let that app get to work.
- Please double check your CSV before importing as you won't be able to update Store Credits in bulk once they are imported. You'll only be able to manually edit them one by one.
